Replacing Antique Auto Glass A Complete Step by Step Guide
Replacing antique auto glass is a rewarding project that restores both the look and safety of your classic car. This guide walks you through every step, from choosing the right glass to installing it like a pro. You will learn about the types of glass used in older vehicles, the tools you need, and the common mistakes to avoid. Whether you are a beginner or a seasoned restorer, this guide makes the process clear and simple. Follow along and bring your vintage ride back to life.
Replacing antique auto glass can feel intimidating at first. But with the right guidance, it is a project anyone can tackle. Whether you own a classic Ford Model A or a vintage Chevy Bel Air, your car deserves proper glass that fits right and looks authentic. This complete step by step guide will walk you through every detail of replacing antique auto glass. You will learn what tools to use, how to pick the right glass, and how to avoid common pitfalls. By the end, you will feel confident enough to do the job yourself.
Old cars have a charm that modern vehicles simply cannot match. But worn out or cracked windows take away from that beauty. Replacing the glass on your antique automobile brings back its original look and feel. It also improves safety, which matters if you plan to drive your classic car on the road. Let us dive into everything you need to know about replacing antique auto glass the right way.
Key Takeaways
- Right glass matters: Using the correct type of glass keeps your antique car safe and authentic.
- Prep work is key: Removing old adhesive and prepping the frame properly ensures a clean, lasting install.
- Patience pays off: Rushing through the process leads to leaks, cracks, and poor fitment.
- Quality tools make a difference: Investing in the right tools saves time and prevents damage.
- Maintenance extends life: Regular care keeps your new glass looking great for years to come.
- Safety first: Always wear proper protection and work in a safe environment.
- Professional help is okay: Complex jobs are best left to experts when needed.
📑 Table of Contents
Why Replacing Antique Auto Glass Matters
Some car owners put off replacing old glass. They think a small crack is not a big deal. But damaged windows on a vintage car cause real problems. Cracked glass weakens the structure of the vehicle. It can also distort your view of the road, which creates a safety risk. When you replace antique auto glass, you are not just fixing a window. You are protecting yourself, your passengers, and the value of your car.
Beyond safety, there is the aesthetic side. A clean, clear window makes a huge difference in how your classic car looks. People notice details when they see a restored vehicle. Foggy, yellowed, or chipped glass screams neglect. A fresh replacement window, on the other hand, makes the whole car look brand new. If you are into classic car restoration, then replacing damaged glass is one of the most impactful upgrades you can make.
Also consider the value of your vehicle. Collectors pay close attention to originality and condition. A car with proper OEM glass commands a higher price than one with mismatched or damaged panels. Whether you drive your antique car or keep it in a garage, replacing antique auto glass is a smart investment.
Safety Benefits of New Glass
Old glass can become dangerously thin over time. Tiny chips turn into large cracks that spread across the entire windshield or door window. In a collision, weak glass shatters in unpredictable ways. Modern safety glass standards did not exist when many antique cars were built. That means your original glass may not offer the protection you expect. Replacing it with properly rated glass improves your safety on the road.
Restoring the Original Look
Part of the joy of owning a vintage vehicle is keeping it looking the way it did when it rolled off the assembly line. Finding the right vintage car windows that match the original curvature and tint is essential. A perfect fit means no gaps, no rattles, and no water leaks. When you take the time to do the job right, the results speak for themselves.
Understanding the Types of Glass Used in Antique Cars
Not all car glass is the same. Antique vehicles used different types of glass depending on the era and the manufacturer. Understanding these differences is the first step in replacing antique auto glass correctly. Using the wrong type of glass can lead to fitment issues, safety problems, and an inauthentic look.
Let us break down the main types of glass you will encounter in classic cars.
Laminated Glass
Laminated glass has been used in automobiles since the 1920s. It consists of two layers of glass with a plastic layer sandwiched in between. This design keeps the glass from shattering into sharp pieces when it breaks. Most antique cars used laminated glass for the windshield. When you are replacing a vintage windshield, look for laminated glass that meets the original specifications.
Tempered Glass
Tempered glass is heated and then cooled rapidly to make it much stronger than regular glass. If it does break, it shatters into small, blunt pieces instead of dangerous shards. Door windows and rear windows on many antique cars were made from tempered glass. When you buy replacement glass for these areas, make sure it is properly tempered.
Plate Glass vs. Safety Glass
Older vehicles, especially those from the 1920s and 1930s, sometimes used flat plate glass. This was standard glass before safety glass became common. If you are restoring a car from this era, you may need to source authentic plate glass for a truly original look. However, many restorers choose to upgrade to modern safety glass for better protection. The choice is yours, but it is good to know what your options are.
OEM vs. Aftermarket Glass
OEM stands for Original Equipment Manufacturer. OEM glass is made by the same company that supplied the glass when your car was new. Aftermarket glass is made by a different company. OEM glass offers the best fit and authenticity. Aftermarket glass can still be high quality and often costs less. Both options work well for replacing antique auto glass. Just make sure to check the dimensions and curvature carefully.
Quick Comparison: Glass Types for Antique Cars
| Glass Type | Used For | Era | Safety Level |
|---|---|---|---|
| Laminated | Windshields | 1920s and later | High |
| Tempered | Door and rear windows | 1930s and later | High |
| Plate Glass | All windows (early cars) | Pre 1920s | Low |
| Modern Safety Glass | All windows (restoration upgrade) | Any era | Very High |
Tools and Materials You Will Need
Before you start replacing antique auto glass, gather everything you need. Having the right tools and materials on hand makes the job smoother and faster. You do not want to stop halfway through because you are missing something important.
Essential Tools
- Glass removal tool: A specialized tool helps you cut away old adhesive without damaging the frame.
- Razor blade or utility knife: Useful for trimming old sealant and cleaning up edges.
- Rubber gloves: Protect your hands from sharp glass and sticky adhesive.
- Safety glasses: Shield your eyes from glass fragments and debris.
- Masking tape: Apply tape around the window edges to prevent scratches during removal.
- Plastic scraper: Gently removes old adhesive from the window channel.
- Wire brush: Cleans rust and old sealant from the window frame.
- Measuring tape: Accurate measurements are critical for finding the right replacement glass.
- Heat gun or hair dryer: Heat softens old adhesive, making removal easier.
- Windshield installation kit: Includes clips, moldings, and gaskets specific to your car model.
Materials Needed
- Replacement glass: Choose the correct type and size for your antique car.
- Auto glass adhesive: Urethane-based adhesives work best for most vintage vehicles.
- Weatherstripping: New seals prevent air and water leaks around the window.
- Window channel or guide: This rubber piece helps the glass move up and down smoothly.
- Adhesive activator: Speeds up the curing process of your glass glue.
- Cleaner and prep solution: Use a glass-safe cleaner to prep the surface before installation.
Quick Tips: Preparing Your Workspace
- Work in a clean, dry area with good ventilation.
- Cover the floor and nearby surfaces with drop cloths.
- Make sure the car is on a flat, stable surface.
- Wear old clothes. Adhesive and glass dust can ruin your good outfits.
- Keep a first aid kit nearby in case of minor cuts.
Step by Step Guide to Replacing Antique Auto Glass
Now comes the fun part. This section takes you through the entire process of replacing antique auto glass from start to finish. Follow each step carefully, and do not rush. Patience is your best friend in this project.
Step 1: Measure the Window
Start by measuring the window opening carefully. Use a measuring tape and record the height, width, and depth. Write down the measurements and double check them. Even a small error can mean the new glass will not fit. If you are buying aftermarket glass, compare your measurements to the manufacturer’s specifications. Some companies offer custom sizes for rare vintage models.
Step 2: Remove the Old Window
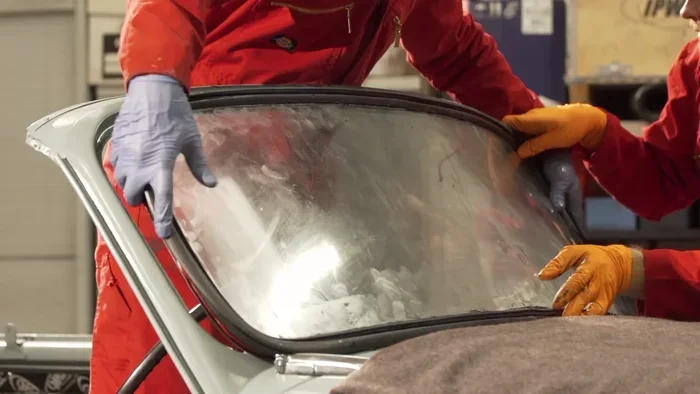
Begin by applying masking tape around the edges of the old glass. This prevents shards from scattering if the glass breaks during removal. Next, use your heat gun to warm up the old adhesive around the window frame. Heat softens the glue and makes it easier to pull the glass out. Work slowly and gently. If the glass is stuck, apply more heat and try again. Never force the glass out, as you risk damaging the frame or injuring yourself.
Once the glass is loose, carefully lift it out of the channel. Place it in a sturdy box immediately. Old glass can be sharp even if it does not look damaged. Wrap it in newspaper or bubble wrap before disposing of it.
Step 3: Remove Old Adhesive and Clean the Frame
With the old glass out, you will see the remaining adhesive stuck to the window channel. Use your plastic scraper to gently remove as much adhesive as possible. Avoid using metal scrapers, as they can scratch or gouge the frame. For stubborn spots, apply heat and scrape again.
After scraping, use a wire brush to clean any rust or old sealant from the channel. The surface should be smooth and clean before you apply new adhesive. This step is crucial. If you skip it, the new adhesive may not bond properly, and your new glass could leak or come loose over time.
Step 4: Install New Weatherstripping and Channel
Now it is time to prep the frame for the new glass. Start by installing new weatherstripping around the window channel. The weatherstripping creates a tight seal that keeps water and air out. Press it firmly into place and make sure there are no gaps or twists.
Next, install the window channel or guide if your car uses one. This rubber piece directs the glass as it moves up and down in the door. Make sure the channel is aligned correctly and sits flush with the frame. A misaligned channel can cause the glass to stick or rattle while driving.
Step 5: Apply Adhesive and Set the New Glass
Apply a thin, even layer of urethane adhesive to the window channel. Use the adhesive applicator that comes with your kit, or a small disposable brush. Do not apply too much adhesive. Excess glue can squeeze out and create a messy finish. A steady bead along the channel is all you need.
Carefully place the new glass into the channel. Press it gently but firmly into position. Make sure it sits evenly and slides smoothly up and down if it is a door window. Use clips or hold-downs to secure the glass in place while the adhesive cures. Follow the manufacturer’s instructions for curing time. Most urethane adhesives need at least 24 hours to set fully.
Step 6: Let the Adhesive Cure and Test the Fit
Do not touch or move the glass during the curing period. This is the hardest part for most DIYers, but it is essential. Disturbing the glass before the adhesive fully sets can lead to a weak bond and future leaks. After the curing time has passed, test the glass by rolling it up and down several times. Check for any gaps, rattles, or uneven movement.
Inspect the edges for any excess adhesive. Use a razor blade to clean up any glue that squeezed out during installation. Wipe the glass with a glass-safe cleaner, and your replacing antique auto glass project is complete.
Common Mistakes to Avoid When Replacing Antique Auto Glass
Even experienced restorers make mistakes. Here are the most common errors and how to avoid them.
- Skipping measurements: Always measure twice and buy once. An incorrect glass size wastes time and money.
- Using the wrong adhesive: Not all adhesives work on vintage car glass. Use a urethane-based product designed for automotive glass.
- Rushing the curing process: Driving your car too soon after installation can cause the glass to shift or leak.
- Ignoring rust: If the window frame has rust, address it before installing new glass. Rust weakens the bond and can spread over time.
- Forcing the glass: If the glass does not fit easily, stop and check your measurements. Forcing it can crack the new glass or damage the frame.
- Forgetting weatherstripping: Skipping new seals leads to water leaks, wind noise, and drafts inside the car.
Tips for Maintaining Your New Antique Auto Glass
Once you have successfully replaced your antique auto glass, the work is not done. Proper maintenance keeps your windows looking great and functioning well for years. A little care goes a long way in preserving the beauty and safety of your classic car.
Clean the Glass Regularly
Use a gentle glass cleaner and a soft microfiber cloth to wipe down your new windows. Avoid harsh chemicals that can damage the glass or the sealant around the edges. For vintage cars, a simple solution of vinegar and water works wonders. Spray it on, wipe it off, and enjoy the crystal clear view.
Inspect the Seals Periodically
Check the weatherstripping and window seals every few months. Look for cracks, gaps, or signs of wear. If a seal is damaged, replace it right away. Small problems with seals can lead to big issues like water damage inside the car. Keeping your seals in good shape is one of the easiest ways to protect your investment.
Handle the Glass with Care
Vintage car windows are more delicate than modern ones. Avoid pressing too hard on the glass when rolling it up or down. If you notice any sticking or grinding, stop and check the window channel. A little lubricant on the rubber guide can keep things moving smoothly. Treat your glass gently, and it will serve you well for decades.
Expert Insights on Antique Auto Glass Replacement
According to veteran classic car restorers, the most important step in replacing antique auto glass is preparation. Taking the time to clean the frame, remove all old adhesive, and install proper seals makes all the difference. One restorer shared, I have replaced hundreds of windows over the years, and the ones that last the longest are always the ones where I took extra care with prep work. Another expert recommends keeping a small piece of the old glass as a reference when shopping for replacement parts. This ensures you get the right thickness, curvature, and tint for your specific model.
Many restorers also suggest joining online forums or clubs dedicated to your car model. These communities are full of people who have done the same job and can offer advice specific to your vehicle. Whether you own a 1930s Buick or a 1960s Mustang, someone in the community has likely faced the same challenge and can point you in the right direction.
When to Call a Professional
Not every glass replacement job needs to be a DIY project. If your antique car has a curved windshield or a rare model that is hard to source parts for, consider seeking professional help. A skilled auto glass specialist has the experience and tools to handle complex jobs with precision. There is no shame in calling an expert, especially if the work involves safety glass on a daily driver. Sometimes the best decision is knowing when to ask for help.
Conclusion
Replacing antique auto glass is a satisfying project that brings your classic car back to life. From choosing the right type of glass to following each step of the installation process, this guide has covered everything you need to know. Remember to take your time, use quality materials, and never skip the prep work. With the right approach, your vintage vehicle will have windows that look original, fit perfectly, and keep you safe on the road.
Whether you are a weekend hobbyist or a serious restorer, learning how to replace antique auto glass is a valuable skill. It saves money, builds confidence, and deepens your connection to the classic car hobby. So grab your tools, find the right glass, and get started. Your antique car is waiting to shine again.
Frequently Asked Questions
How much does it cost to replace antique auto glass?
The cost varies depending on the car model, glass type, and whether you choose OEM or aftermarket glass. On average, expect to spend between 150 and 500 dollars per window. Labor costs will add more if you hire a professional. DIY installation saves you money but requires the right tools and patience.
Can I use modern safety glass in my antique car?
Yes, many restorers choose to use modern safety glass for improved protection. It fits just as well and offers better impact resistance. However, purists who want an authentic restoration may prefer period correct glass. The choice depends on your goals and how you use the car.
How long does adhesive take to cure after replacing antique auto glass?
Most urethane adhesives need 24 to 48 hours to cure fully. During this time, avoid driving the car or putting pressure on the glass. Check the product instructions for the exact curing time. Curing in warm, dry conditions helps the adhesive set faster and stronger.
Where can I find replacement glass for rare antique cars?
Specialty suppliers and vintage auto parts dealers are the best sources. Online forums and car clubs are also great places to find hard to find glass. Some companies offer custom cut glass for rare models. Always verify the dimensions and thickness before ordering.
What is the difference between OEM and aftermarket antique auto glass?
OEM glass is made by the original manufacturer and matches the exact specifications of your car. Aftermarket glass is made by a third party and may vary slightly in fit or tint. Both options work well, but OEM glass offers the best authenticity for a full restoration. Aftermarket glass is often more affordable and easier to find.
Can I replace antique auto glass myself if I have no experience?
Yes, with the right tools, materials, and patience, beginners can successfully replace antique auto glass. Start with a simple door window before attempting a windshield. Follow each step carefully, and do not rush the process. If you feel unsure, watch video tutorials or ask for advice from experienced restorers in online communities.