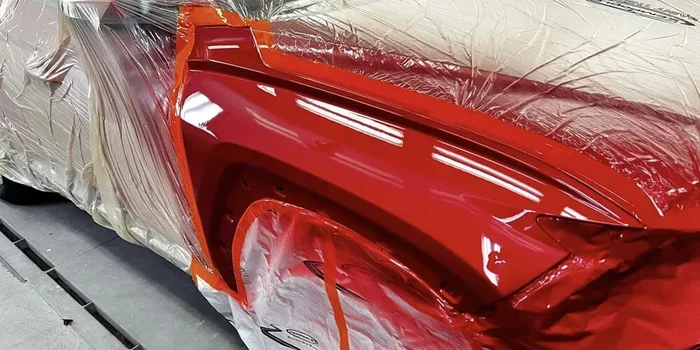
Should I Put Clear Coat Over Touch-Up Paint On My Car
Should I put clear coat over touch-up paint? Yes, applying a clear coat over touch-up paint protects the repair and restores your car’s shine. A clear coat acts as a shield against UV rays, road debris, and moisture. Without it, your touch-up paint can chip, fade, or rust quickly. This guide covers everything you need to know about clear coat application, timing, and best practices.
This is a comprehensive guide about Should I Put Clear Coat Over Touch-Up Paint?.
Key Takeaways
- Clear coat protects: It seals the touch-up paint and adds a durable, glossy layer that shields against damage.
- Timing matters: Always let touch-up paint dry fully before applying clear coat for the best bond.
- Wet sanding helps: Light wet sanding before clear coat creates a smooth surface for better adhesion.
- Spray can works: A quality spray clear coat is the easiest and most affordable option for most DIYers.
- Avoid common mistakes: Applying too thick, skipping primer, or rushing the dry time causes peeling and dullness.
- Buff and polish after: Final polishing brings back the deep shine and blends the repair seamlessly.
[FEATURED_IMAGE_PLACEHOLDER]
Should I Put Clear Coat Over Touch-Up Paint On My Car
If you have ever touched up a scratch or chip on your car, you have probably wondered about the clear coat step. The question should I put clear coat over touch-up paint comes up in every car owner’s mind at some point. The short answer is yes. Applying a clear coat over your touch-up paint is one of the best things you can do to protect the repair and make it last.
Without a clear coat, your touch-up paint sits bare and vulnerable. Sun UV rays, rain, road salt, and even minor scrapes can damage it fast. A clear coat adds a hard, glossy shell that locks the color in place. Think of it like putting a protective lid on a jar. The jar stays fresh longer, just like your paint job.
This guide will walk you through everything you need to know. We will cover why clear coat matters, when to apply it, which products to use, and the mistakes to avoid. Whether you are a beginner or a seasoned DIYer, you will find practical tips that actually work.
Why Clear Coat Matters for Touch-Up Paint
Your car’s paint system has three layers. There is the primer, the base color coat, and the clear coat on top. The clear coat is what gives your car that deep, shiny look. It also serves as the first line of defense against the elements. When you only apply touch-up paint without a clear coat, you are leaving that repair exposed and weak.
Here is why clear coat is so important for car paint repair:
- UV protection: The sun breaks down paint over time. Clear coat blocks harmful rays that cause fading and oxidation.
- Scratch resistance: A clear coat adds hardness. It helps the repair resist minor scratches from brushes, keys, and road debris.
- Water barrier: Moisture is one of the biggest enemies of exposed paint. Clear coat seals out water and prevents rust.
- Gloss and shine: Touch-up paint alone often looks flat or dull. Clear coat brings back that factory-level gloss.
- Color depth: Clear coat enhances the richness of your car’s color. It makes the repair blend better with the surrounding paint.
Skipping clear coat is like skipping sunscreen. Your skin might be fine for a day, but over time the damage adds up. The same goes for your car’s paint. A good clear coat finish can mean the difference between a repair that lasts years and one that fails in a few months.
What Happens Without Clear Coat
Let me paint a picture. You touch up a small chip on your hood. You let it dry and it looks great. But within a few weeks, you notice the color is starting to fade. Maybe you see rust creeping in around the edges. The paint looks chalky and rough. This is what happens when you skip the clear coat.
Without that top layer, the touch-up paint has no real protection. Rain, car washes, sunlight, and even dust can wear it down fast. In cold climates, road salt accelerates corrosion right at the repair site. What started as a tiny chip can turn into a bigger problem. That is why so many car owners learn the hard way that clear coat over primer and color coat is not optional. It is essential.
When Should You Apply Clear Coat Over Touch-Up Paint
Timing is everything when it comes to clear coat application. You cannot just paint and immediately spray clear coat on top. Each layer needs time to cure properly. Rushing this process is one of the biggest mistakes people make with automotive touch-up work.
Here are the key moments when you should apply clear coat:
- After the touch-up paint has fully dried: Most touch-up paints need at least 24 to 48 hours to dry completely. Check the product instructions on your automotive touch-up kit.
- When the surface is smooth: If you applied the paint in a thick layer, let it dry and then lightly sand it smooth before adding clear coat.
- In dry, moderate weather: Avoid applying clear coat in extreme heat, cold, or high humidity. Ideal temperatures range between 60 and 80 degrees Fahrenheit.
- In a clean, dust-free environment: Dust and debris can stick to wet clear coat and ruin the finish. A garage or indoor space works best.
How Long to Wait Before Applying Clear Coat
The clear coat drying time depends on the product you use. Most spray clear coats are ready to handle within 30 minutes to an hour. But full cure takes longer. Here is a general timeline:
- Touch-up paint application: Apply thin layers and let each dry for 15 to 30 minutes.
- Final dry time for paint: Wait at least 24 hours before clear coat.
- Clear coat first coat: Spray in light, even passes. Let dry 30 to 60 minutes.
- Clear coat second coat: Apply a second layer after the first is dry. This adds depth and protection.
- Full cure: Wait 48 to 72 hours before washing or buffing the area.
Patience is your best friend here. If you apply clear coat too early, it can trap moisture underneath and cause bubbling or peeling. Give each layer the time it needs.
How to Apply Clear Coat Over Touch-Up Paint
Now let us get into the step-by-step process. Applying clear coat over touch-up paint is not hard, but it does require some care and attention to detail. Follow these steps and your repair will look professional.
Step 1: Prep the Area
Before you spray anything, prep the area properly. Start by washing the repair zone with soap and water. This removes dirt, grease, and any loose particles. Dry the area completely with a clean microfiber cloth.
Next, use a fine-grit sandpaper, around 2000 to 3000 grit, to lightly sand the touch-up paint. This creates a slightly rough surface that helps the clear coat grip. Do not sand too hard. You just want a light matte texture. Wipe the area with a tack cloth to remove any dust.
Step 2: Choose the Right Clear Coat Product
Not all clear coats are the same. For most DIY repairs, a spray can clear coat works great. Look for a product that matches your car’s paint type. Most modern cars use a clear coat paint system, which is a two-stage process with base color and clear topcoat.
Some popular options include:
- Spray can clear coat: Affordable and easy to use. Great for small repairs.
- Brush-on clear coat: Offers more control but can leave brush marks. Best for experienced users.
- Paint pen clear coat: Compact and convenient for tiny touch-ups.
Make sure the clear coat is compatible with your touch-up paint. If you are unsure, check the brand and product line. Many automotive paint brands sell matching clear coats in the same product family.
Step 3: Spray the Clear Coat
Hold the spray can about 6 to 8 inches from the surface. Spray in thin, even passes. Do not hold the can in one spot. Keep it moving side to side in a steady motion. Start and stop spraying off the edges of the repair area to avoid buildup.
Apply 2 to 3 thin coats rather than one thick coat. Thick coats take longer to dry and are more likely to drip or sag. Between each coat, let it dry for 15 to 30 minutes. The layers should build up gradually for a smooth, even finish.
Step 4: Let It Cure
Once you have applied all the coats, let the area cure for at least 48 hours. During this time, avoid touching, washing, or covering the repair. The clear coat needs time to harden fully. In warmer weather, cure times may be shorter. In cooler or humid conditions, give it extra time.
Step 5: Buff and Polish
After the clear coat has fully cured, it is time to bring back the shine. Use a polishing compound and a soft microfiber cloth or a dual-action polisher. Work in small circles over the repaired area. This removes any slight haze and blends the clear coat with the surrounding paint.
You will be amazed at how much better the repair looks after polishing. The area should match the rest of the car’s finish and have that same deep, glossy look. This final step really makes a difference in the overall appearance of your car scratch fix.
Common Mistakes to Avoid
Even with the best intentions, people make mistakes when applying clear coat over touch-up paint. Here are the most common ones and how to avoid them.
Applying Clear Coat Too Thick
This is the number one mistake. Thick clear coats dry unevenly and can sag or drip. They also take much longer to cure and may yellow over time. Always spray thin, light coats. Multiple thin layers always beat one heavy layer.
Skipping the Prep Work
Some people rush straight to spraying without prepping the surface. This leads to poor adhesion and a finish that peels or chips quickly. Always clean, sand lightly, and dust off before applying clear coat. Prep work is the foundation of a good repair.
Applying in Bad Weather
High humidity, extreme heat, or cold temperatures all affect how clear coat dries. In humid conditions, moisture can get trapped under the coat. In extreme heat, the paint dries too fast and does not level properly. Choose a mild, dry day for best results.
Not Letting Each Layer Dry
Impatience causes a lot of problems. If you apply the next coat before the previous one is dry, you risk smudging, bubbling, or peeling. Follow the drying times on the product label and wait a little extra if conditions are not ideal.
Using the Wrong Clear Coat
Not every clear coat works with every paint type. Using the wrong product can lead to adhesion failure or chemical reactions that damage the repair. Always check compatibility before you buy.
Clear Coat vs. No Clear Coat: A Comparison
Let us look at a quick side-by-side comparison of touch-up paint with and without clear coat. This table shows the key differences you can expect.
| Factor | With Clear Coat | Without Clear Coat |
|---|---|---|
| Protection | High resistance to UV, moisture, and scratches | Low, exposed to elements |
| Durability | Lasts several years with proper care | May chip or fade within months |
| Appearance | Glossy, deep, factory-like finish | Flat, dull, uneven look |
| Rust Prevention | Seals out moisture effectively | Vulnerable to rust at repair site |
| Maintenance | Easy to clean, washes well | Requires extra care, prone to damage |
| Cost | Slight extra cost for clear coat product | Saves on clear coat but costs more in long-term repairs |
The comparison makes it clear. Adding clear coat gives you far more protection and a better-looking result. The small extra cost and effort pay off in the long run.
Expert Tips for the Best Results
Here are some insider tips that experienced detailers and body shop professionals use to get flawless clear coat over touch-up paint results.
- Test spray first: Always spray a test coat on a piece of cardboard or a hidden area. This helps you get a feel for the spray pattern and distance.
- Use a guide coat: After sanding, wipe the area with a dark guide coat marker. This highlights any low spots or rough areas so you can smooth them out before clear coat.
- Keep the can warm: Cold spray cans do not atomize well. Store your clear coat can in a warm area before use for a smoother spray.
- Add a third coat for depth: A third thin coat of clear coat adds extra depth and makes the repair nearly invisible.
- Use a UV protectant: After the repair is complete, apply a UV protectant wax or ceramic coating over the area for added long-term protection.
- Be patient with buffing: Do not rush the polishing step. Take your time to bring out the full gloss and blend.
When to Seek Professional Help
DIY touch-up and clear coat work works great for small chips and scratches. But there are times when professional help is the better choice. If the damage is deep, covers a large area, or goes down to bare metal, a professional can deliver a much better result.
Also, if you are not comfortable with spray work, a body shop or detailer can handle paint correction and clear coat application with professional-grade equipment. The results will be far superior to a DIY job. There is no shame in seeking help, especially for visible areas like the hood, fenders, or doors.
For minor repairs, though, a DIY approach saves money and builds skills. Once you get the hang of it, you will feel confident tackling more repairs on your own.
Final Thoughts
The answer to should I put clear coat over touch-up paint is a clear and definite yes. Clear coat protects your repair, enhances the appearance, and extends the life of the paint job. It is a simple step that makes a huge difference. Whether you are fixing a small chip from a rock or a scratch from a shopping cart, clear coat is the finishing touch that turns a basic repair into something lasting.
Take your time with the process. Prep the surface, apply thin coats, let each layer dry, and finish with a good polish. Follow these steps and your car will look as good as new. The effort you put in now saves you from bigger headaches down the road. Protect your investment and enjoy that beautiful finish for years to come.
FAQs
Can I apply clear coat directly over touch-up paint without sanding?
You can, but sanding lightly first helps the clear coat adhere better. A quick pass with fine-grit sandpaper creates a slightly rough surface that improves bonding. Skipping sanding may result in peeling or poor adhesion over time.
How many coats of clear coat should I apply over touch-up paint?
Two to three thin coats work best. Each coat should be light and even. Multiple thin layers build up better protection and a smoother finish than one thick coat.
Can I wash my car after applying clear coat over touch-up paint?
Wait at least 48 to 72 hours before washing. The clear coat needs full cure time to harden properly. Washing too early can leave water spots or damage the fresh finish.
Will clear coat prevent rust on a touch-up repair?
Yes, clear coat acts as a moisture barrier that helps prevent rust. It seals out water and road salts that cause corrosion. However, make sure the touch-up paint is applied properly and covers the bare metal completely.
What is the best clear coat spray for touch-up repairs?
Look for a clear coat that matches your car’s paint brand and code. Products from brands like Dupli-Color, Meguiar’s, and 3M are popular choices. Always check that the clear coat is designed for automotive use.
Can I use a brush instead of a spray can for clear coat?
Yes, but a spray can gives a smoother, more even finish. Brush application can leave visible strokes or bubbles. If you are a beginner, a spray can is the easiest and most reliable option for automotive clear coat application.
Frequently Asked Questions
What is Should I Put Clear Coat Over Touch-Up Paint??
Should I Put Clear Coat Over Touch-Up Paint? is an important topic with many practical applications.