How to Build an Awesome 3d Printed Car Model Step by Step
Building a 3d printed car model is one of the most rewarding projects for hobbyists and makers. This step-by-step guide walks you through everything from choosing the right design to painting your finished masterpiece. You will learn practical tips, avoid common mistakes, and create a stunning scale replica that looks incredible on your shelf.
Have you ever dreamed of holding a miniature version of your favorite car right in your hands? 3d printed car models make that dream a reality. Whether you are a seasoned hobbyist or a complete beginner, building a scale model car with a 3D printer is an incredibly fun and satisfying experience.
The beauty of 3d printing is that you can create anything you can imagine. Cars, trucks, motorcycles — the possibilities are endless. And with modern printers and materials, the results look absolutely stunning. In this guide, we will walk you through every single step of the process. You will learn how to pick the right design, set up your printer, assemble the pieces, and finish your model like a pro.
By the time you finish reading, you will have all the knowledge you need to start your first 3d printed vehicle project. Let us dive in and build something amazing together.
Key Takeaways
- Choose the right 3d printer and filament: FDM printers with PLA or PETG filament work great for car models. Resin printers deliver finer detail for small-scale replicas.
- Start with a quality STL file or 3D model: Download from trusted sources like Thingiverse or design your own using free CAD software.
- Master your slicer settings: Layer height, infill, and print speed directly affect the quality of your scale model car.
- Post-processing makes all the difference: Sanding, priming, and painting transform a raw print into a professional-looking model.
- Assembly requires patience: Use cyanoacrylate glue and clamps to bond parts cleanly without visible seams.
- Display your finished model proudly: A proper base and clear coat will protect your 3d printed vehicle for years.
📑 Table of Contents
Understanding 3d Printed Car Models
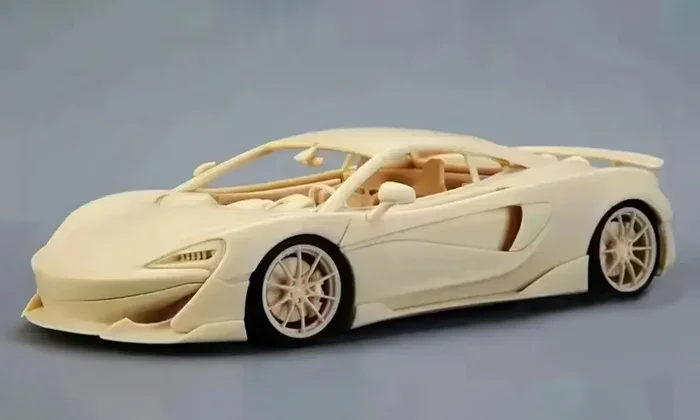
Before you start printing, it helps to understand what you are working with. A 3d printed car model is a miniature replica of a real or fictional vehicle created using additive manufacturing technology. These models range from simple toys to highly detailed display pieces that rival traditional store-bought kits.
The process starts with a digital 3D file. This file tells your printer exactly where to deposit material layer by layer. Once the print finishes, you clean it up, assemble the parts, and finish it. The result is a custom model car kit that you designed and built yourself.
Types of 3D Printers for Car Models
Not all printers are created equal. Here is a quick look at the two main types used for model car building:
- FDM Printers (Fused Deposition Modeling): These are the most popular and affordable options. They melt plastic filament and lay it down layer by layer. FDM printers work great for larger car models and are perfect for beginners.
- SLA/Resin Printers: These use UV light to cure liquid resin. They produce incredibly smooth surfaces and fine details. Resin printers are ideal for small-scale 3d printed vehicles with intricate parts like grilles and wheels.
For most scale model car projects, an FDM printer with a 0.4mm nozzle will give you excellent results. If you want ultra-fine detail, consider investing in a resin printer. Both options can produce stunning 3d print car replicas.
Choosing the Right Filament
Your filament choice affects the look, strength, and ease of printing your 3d printed car model. Here are the most popular options:
- PLA (Polylactic Acid): Easy to print, eco-friendly, and available in tons of colors. PLA is the go-to filament for most beginners. It works well for display models that do not need to bear heavy stress.
- PETG (Polyethylene Terephthalate Glycol): Stronger and more durable than PLA. PETG has a slight flex and resists moisture well. It is a great choice if your car model has thin parts like bumpers or spoilers.
- ABS (Acrylonitrile Butadiene Styrene): Tough and heat-resistant. ABS is what many real car parts are made from. However, it requires a heated bed and good ventilation due to fumes.
For your first 3d print car project, stick with PLA. It is forgiving, easy to work with, and produces clean results. You can always experiment with other materials as you gain experience.
Finding or Designing Your Car Model
Every 3d printed car model starts with a digital file. You have two main paths: downloading a pre-made design or creating your own from scratch. Both approaches work great, and each has its own advantages.
Downloading Pre-Made STL Files
If you want to get started quickly, downloading an STL file is the way to go. STL files are the standard format for 3D printing. They contain all the 3D shape data your printer needs to create the object.
Here are some of the best places to find 3d print car designs:
- Thingiverse: One of the oldest and largest repositories for free 3D files. You can find thousands of car models in every scale and style.
- MyMiniFactory: A curated platform with high-quality, verified prints. Many models here are tested and proven to work well.
- Printables: Created by Prusa, this site offers community-uploaded designs with ratings and comments to help you choose.
- Cults3D: A marketplace with both free and paid models. You can find highly detailed supercars, classic cars, and more.
When choosing a file, pay attention to the scale and the level of detail. Some 3d printed vehicles are designed as simple display pieces, while others include working parts like opening doors or hoods. Pick one that matches your skill level and goals.
Designing Your Own Car Model
For those who want full creative control, designing your own scale model car is incredibly rewarding. You do not need expensive software either. Free tools like Blender, Fusion 360, and Tinkercad let you create professional-quality 3d print car designs.
Start simple. Try modeling a basic car shape first. Focus on getting the proportions right. Once you are comfortable, you can add details like headlights, taillights, and interior features. The beauty of model car building is that you can iterate and improve your design as many times as you want.
Preparing and Slicing Your Model
Slicing is the bridge between your digital file and the physical print. A slicer software converts your STL file into instructions that your printer can understand. It tells the printer how fast to move, how thick each layer should be, and where to add support structures.
Choosing the Right Slicer
Most 3d printing hobby enthusiasts use one of these popular slicers:
- Cura: Free and open-source. Cura works with almost all FDM printers and offers tons of customization options.
- PrusaSlicer: Developed by Prusa, this slicer is fast, reliable, and produces excellent surface quality.
- Chitubox: The go-to slicer for resin printers. It handles resin printing files and supports structures with ease.
For 3d printed car models, Cura and PrusaSlicer are excellent choices. Both are free, well-documented, and packed with features that help you get the best print quality.
Key Slicer Settings for Car Models
Getting the right 3d printer settings is crucial for a high-quality scale model car. Here are the settings you should pay attention to:
- Layer Height: For car models, use a layer height between 0.1mm and 0.2mm. Thinner layers produce smoother surfaces but take longer to print. A 0.16mm layer height is a sweet spot for most projects.
- Infill Percentage: Car models do not need to be super strong. Use 15-20% infill for display pieces. This saves filament and print time without sacrificing appearance.
- Print Speed: Slow down for detailed areas. A speed of 40-50mm/s works well for most car model parts. Slower speeds give the printer more time to reproduce fine details.
- Support Structures: Overhangs like roof lines and spoilers need supports. Enable tree supports in Cura for easier removal and less scarring on your 3d printed vehicle.
- Retraction: Enable retraction to prevent stringing between parts. This keeps your car model clean and reduces post-processing work.
Take time to experiment with these settings. Every printer and filament behaves differently. Run a small test print before committing to a full car model. This saves time, filament, and frustration.
Printing Your Car Model Parts
Now comes the exciting part — watching your 3d printed car model come to life. But printing is only half the battle. Proper preparation and monitoring make all the difference.
Preparing the Print Bed
A clean, well-leveled bed is essential for successful prints. Here is a quick checklist:
- Clean the bed with isopropyl alcohol before every print.
- Level the bed according to your printer’s instructions.
- Apply a thin layer of glue stick or use a PEI sheet for better adhesion.
- Preheat the bed to the recommended temperature for your filament.
For 3d print car projects with many small parts, use a brim or raft to prevent warping. A brim adds a flat edge around the base of your print, keeping it stuck to the bed throughout the entire print.
Printing Time and Patience
A detailed scale model car can take anywhere from 12 to 40 hours to print, depending on the size and detail level. Larger models with fine features like a 1:12 scale replica will take longer. Plan ahead and let your printer run overnight or while you are at work.
Do not open the printer enclosure too often during a long print. Temperature fluctuations can cause warping and layer separation. Trust the process and let your printer do its thing.
Post-Processing and Assembly
This is where your 3d printed vehicle transforms from a rough print into a polished masterpiece. Post-processing includes removing supports, sanding, assembling parts, and finishing the surface.
Removing Supports and Cleaning Up
After your print finishes, carefully remove all support structures. Use needle-nose pliers and a sharp hobby knife for clean removal. Go slowly to avoid damaging delicate parts like mirrors or spoilers.
For stubborn support marks, use fine-grit sandpaper. Start with 220-grit and work your way up to 400-grit or higher. Sand in gentle circular motions to create a smooth surface ready for painting.
Assembling the Model
Most 3d printed car models come in multiple parts that need to be assembled. Here is how to do it right:
- Dry-fit all parts before gluing. This helps you identify any fit issues and plan your assembly order.
- Use cyanoacrylate (super glue) for bonding PLA and PETG parts. It sets quickly and creates a strong bond.
- Apply a small drop of glue to each joint. Less is more — excess glue creates visible mess.
- Use spring clamps or rubber bands to hold parts in place while the glue cures.
- Let each joint dry completely before moving on to the next step.
Patience is your best friend during assembly. Rushing through this stage leads to misaligned parts and visible seams. Take your time and enjoy the process of putting your model car kit together piece by piece.
Sanding and Priming
Once your model is fully assembled, it is time to prepare the surface for paint. Start with a coarse sandpaper (220-grit) to smooth out layer lines and glue joints. Then switch to a finer grit (400-600) for a polished finish.
Apply a coat of primer designed for plastic models. Primer does three important things:
- It creates a uniform surface for paint to adhere to.
- It highlights any remaining imperfections or sanding marks.
- It gives you a preview of the final color and finish.
Let the primer dry completely, then lightly sand again with 600-grit sandpaper. This gives you an ultra-smooth surface that is ready for paint.
Painting and Finishing Your 3D Printed Car
Painting is the most creative part of building a 3d printed car model. It is where your model goes from a plain plastic replica to a vibrant, realistic scale model car that turns heads.
Choosing the Right Paint
For 3d printed vehicles, acrylic paints are the best choice. They adhere well to plastic, dry quickly, and clean up with water. Here are some options:
- Acrylic Spray Paint: Great for achieving a smooth, even coat. Use light, thin passes to avoid drips and runs.
- Brush-On Acrylics: Perfect for adding details like racing stripes, emblems, and interior trim.
- Enamel Paints: These provide a hard, durable finish. They are ideal for wheels and undercarriage areas that see handling.
Before painting the entire model, test your colors on a spare print or a hidden area. This ensures you are happy with the result before committing to the full 3d print car.
Adding Realistic Details
To make your 3d printed car model truly stand out, add realistic details:
- Paint the windows with a dark shade and leave a thin white line for the window frame.
- Use a fine-tip brush to add headlights and taillights with bright colors.
- Apply a clear coat to protect the paint and give the model a glossy or matte finish.
- Add decal stickers for racing stripes, brand logos, or license plates.
- Attach small details like side mirrors, roof racks, or spoiler wings with a tiny drop of glue.
These small touches make a huge difference. They elevate your 3d printed vehicles from a simple print to a display-worthy piece of art.
Common Mistakes to Avoid
Even experienced makers run into trouble sometimes. Here are the most common mistakes people make when building a 3d printed car model and how to avoid them:
- Skipping bed leveling: A poorly leveled bed causes uneven first layers, which ruins the entire print. Always level your bed before starting a new project.
- Using too much infill: High infill wastes filament and time. For display models, 15-20% is more than enough.
- Ignoring retraction settings: Without proper retraction, your model will have stringing that looks messy and takes extra time to clean up.
- Rushing the sanding process: Skipping grits leaves visible scratches under the paint. Work through the grits progressively for the smoothest finish.
- Gluing parts while wet: If you use solvent-based cement, let it dry fully before handling the assembly. Moving parts too soon weakens the bond.
- Forgetting to check the STL file: Always inspect your downloaded file for errors before slicing. A corrupted file can cause failed prints and wasted filament.
Being aware of these pitfalls saves you time, money, and frustration. Every mistake is a learning opportunity that makes you a better 3d printing hobby enthusiast.
Displaying and Protecting Your Finished Model
Your 3d printed car model is complete. Now it is time to show it off. A proper display setup protects your hard work and makes the model the centerpiece of any collection.
Use a display stand or acrylic case to keep dust off your scale model car. A custom-built stand adds a professional touch and lets you position the car at the perfect angle. You can 3D print a matching stand using the same filament and color scheme as your model.
Apply a final clear coat to seal the paint and protect against UV damage and fingerprints. A matte clear coat gives a realistic matte factory finish, while a glossy clear coat creates a showroom shine. Either way, your 3d printed vehicle will look fantastic and stay protected for years to come.
Conclusion
Building a 3d printed car model is one of the most enjoyable and creative projects you can tackle with a 3D printer. From selecting the perfect design and dialing in your slicer settings to sanding, painting, and assembling every piece — each step brings you closer to a finished masterpiece that you can be truly proud of.
The 3d printing hobby rewards patience, creativity, and attention to detail. Every print teaches you something new. Every model you build improves your skills and expands your confidence. Whether you create a faithful replica of a classic muscle car or a futuristic concept vehicle, your 3d print car will stand as a testament to your craftsmanship and passion.
So grab your STL file, fire up your printer, and start building today. The road to creating an awesome 3d printed car model begins with a single print. And we cannot wait to see what you create.
Frequently Asked Questions
What is the best scale for a 3d printed car model?
The most popular scales for 3d printed vehicles are 1:18, 1:24, and 1:43. Larger scales like 1:18 offer more detail and are easier to print. Choose a scale that fits your printer’s build volume and your display preferences.
Do I need an expensive 3D printer to build a car model?
No. Many affordable FDM printers produce excellent 3d printed car models. A printer with a build volume of at least 200x200x200mm handles most car model projects. You do not need a top-of-the-line machine to get great results.
How long does it take to print a car model?
Print time depends on the scale, detail level, and printer speed. A small 1:43 scale model might take 6-10 hours. A large 1:12 scale model with fine details can take 30-50 hours or more. Plan accordingly and let your printer work overnight.
Can I make a 3d printed car model that moves?
Yes! Some 3d print car designs include working wheels, opening doors, and movable suspension. These require more careful design and assembly but are incredibly satisfying to build. Look for models specifically designed with moving parts.
What is the best way to paint a 3d printed car model?
Acrylic paints work best for 3d printed vehicles. Start with a primer coat, then apply thin layers of acrylic paint using a spray can or airbrush. Finish with a clear coat to protect the paint and add a professional shine.
Is resin or FDM better for printing car models?
Resin printers produce smoother surfaces and finer details, making them ideal for small-scale scale model cars. FDM printers are better for larger models and are more beginner-friendly. Choose based on your budget, printer availability, and the level of detail you need.